How to Use Qwen Image Edit Online: Step-by-Step Guide
From upload to download in four steps — plus the five rules for writing instructions that land on the first try.
Before you start
All you need is a photo in JPG, PNG or WebP format up to 8 MB. There is nothing to install and no account to create. Shots around 1000–2000 pixels wide give the best balance of speed and detail — your phone’s normal output is perfect, and bigger photos are scaled down in your browser before the edit starts, so the original file on your device never changes.
Step 1 — Upload your photo
Drag the photo onto the editor or click to choose a file. A thumbnail appears so you can confirm it is the right picture. Everything happens locally at this stage: the preview, the scaling, the format check. Nothing leaves your device until you press the edit button.
Step 2 — Pick a category or write your own instruction
The six category chips (Background, Objects, Style, Text, Portrait, Restore) fill the instruction box with a proven starting sentence. That is the fastest path for common edits. For anything specific, write your own line — plain English, the way you would ask a person. “Replace the background with a sunny beach at golden hour, keep the person exactly the same” is a complete, well-formed instruction.
Step 3 — Edit and compare
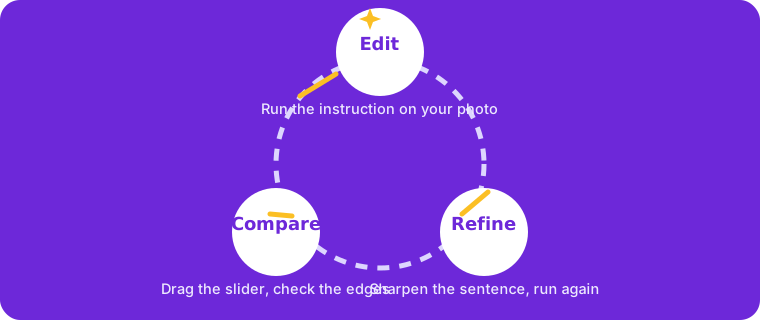
Press Edit my photo. Generation usually finishes in seconds; the button shows a progress state while you wait. The result opens in a before/after comparison — drag the slider to inspect edges, faces and text closely. This check matters: a background swap should keep hair edges clean, an object removal should leave no ghosting.
Step 4 — Download or refine
Happy with it? Download the result at full size. Not quite? Do not start from scratch — press Edit this photo again and sharpen the sentence: name the exact object, add the color you wanted, or split the change into two smaller edits. Each pass is independent, so iterating costs you nothing but a few seconds.
Five rules for instructions that work
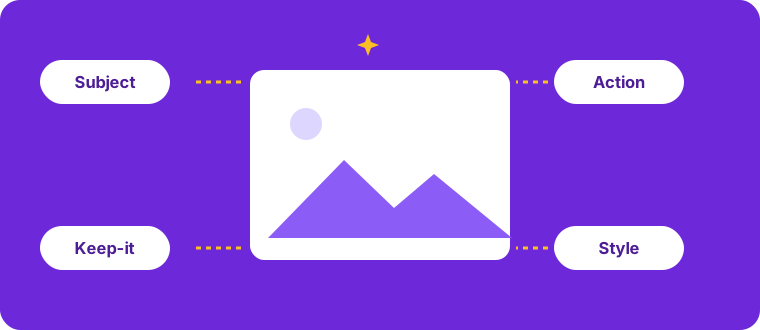
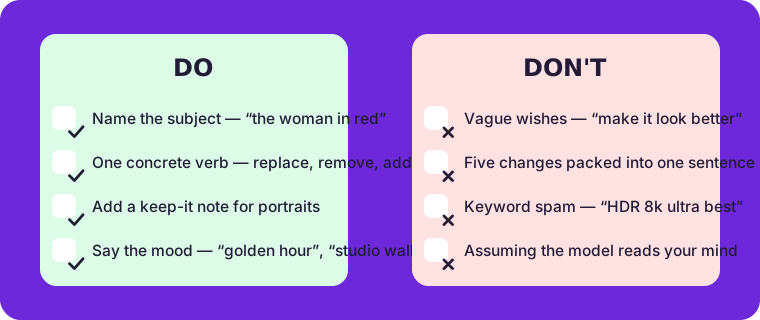
Name the subject first
“The woman in red” tells the model what must stay identical while everything else can change.
Use one concrete verb
Replace, remove, add, restore, change — verbs produce results; “make it nicer” produces guesswork.
Specify what to keep
A keep-it note (“keep the pose and outfit”) prevents over-eager edits, especially on portraits.
One change per pass
Two related changes can share a sentence. Five unrelated changes belong in five passes.
Add style and light hints
“Golden hour”, “clean studio wall”, “natural tones” — short mood words steer the look more than long descriptions.
Do and don’t at a glance
Limitations worth knowing
Instruction-based editing is powerful but not magic. Extremely tiny faces may stay soft when you change them; dense text in fancy fonts can need two passes to become perfectly crisp; and mirrored or reflected objects sometimes need the instruction to mention them explicitly. None of these are deal-breakers — they are the reason the refine pass exists. For a library of phrasing that avoids the common traps, see the prompt ideas page, and when in doubt, upload the photo and test the instruction directly.
Frequently asked questions
Does editing reduce my photo’s quality?
Photos are scaled in your browser for speed, and the result comes back at the edited resolution — plenty for social posts, stores and printing at typical sizes. Keep your original file; it is never modified.
Can I edit screenshots or product photos?
Yes — text fixes, background replacement and logo swaps are among the strongest use cases, which is why store owners and resellers use instruction editors daily.
Why did my edit change something I didn’t ask for?
Usually the instruction was ambiguous, so the model guessed. Re-run the edit with a keep-it note naming exactly what should stay untouched.